- Regenerative Filler
I teach you how to take advantage of Regenerative Fill in Photoshop to magically expand your images with Artificial Intelligence
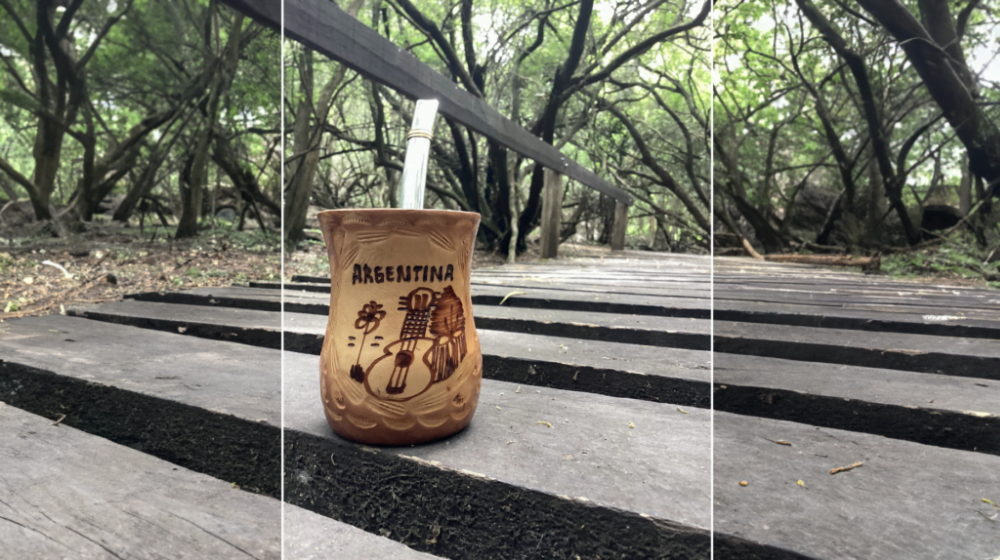
As I told you previously in the previous article, generative AI in Photoshop is here thanks to an amazing new feature called Generative Fill. And with it comes a whole new way to use Photoshop. Things that might have previously taken a long time for even the most expert Photoshop users can now be done by anyone in just a few minutes. Generative Fill turns Photoshop into a playground for your imagination and the world of image editing is now open to everyone.
In this tutorial, I'll show you how to use Generative Fill, powered by Adobe's generative AI called Firefly, to magically stretch an image and turn a portrait photo into a landscape photo before your very eyes.
As you’ll see, Photoshop fills the extended area with original AI-generated content that matches the lighting, shadows, perspective, and even depth of field of the original photo. You have to see it to believe it.”
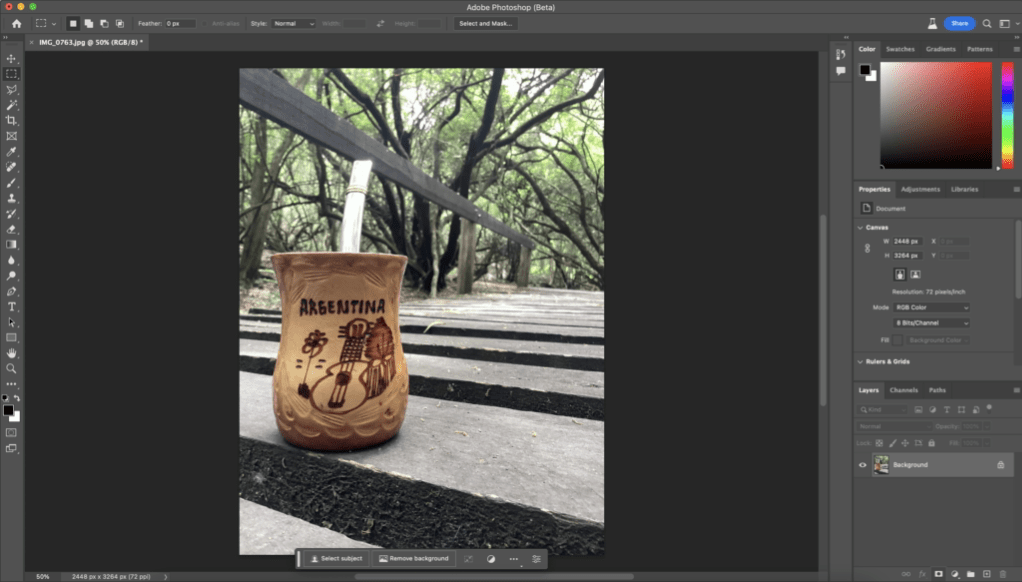
This is the image we're going to use. It's where I'm going to show you how to use Generative Fill in Photoshop to stretch an image. I'll start by showing you how to stretch one side of an image, and once we've covered the basics, we'll look at how to stretch both sides at the same time.
I also show you how to fix minor issues with AI-generated content using Photoshop's new removal tool, which is also powered by AI.
Here is the step-by-step guide to using this extension through AI. It is very important to note that at the time of launch you have to use the Beta version of Photoshop exclusively. This feature is not yet available in the full version.
The first thing we are going to do is select the cutting tool that I show in the following image.
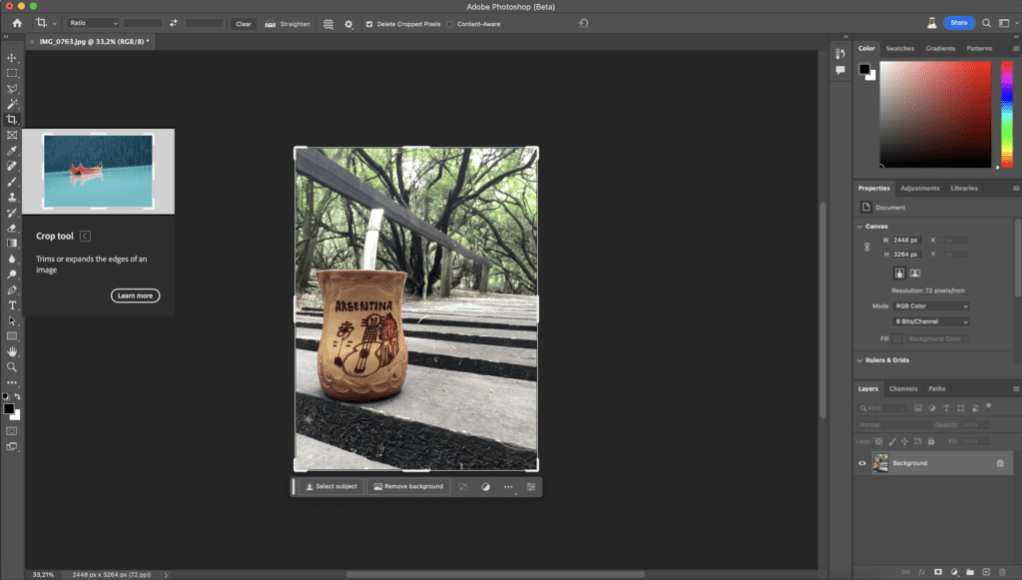
Next, we're going to stretch the image as shown below to the sides, or to just one side if we want (it can also be up or down, it's important to note). Once we do this, we'll be ready to perform the AI construction.
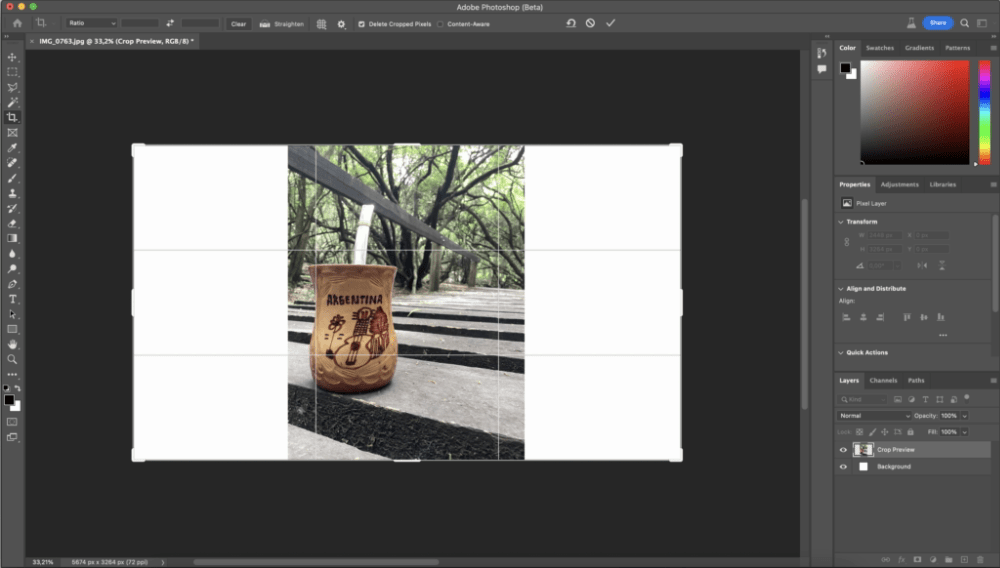
What we will do next is select the rectangular frame tool, as shown in the following image.
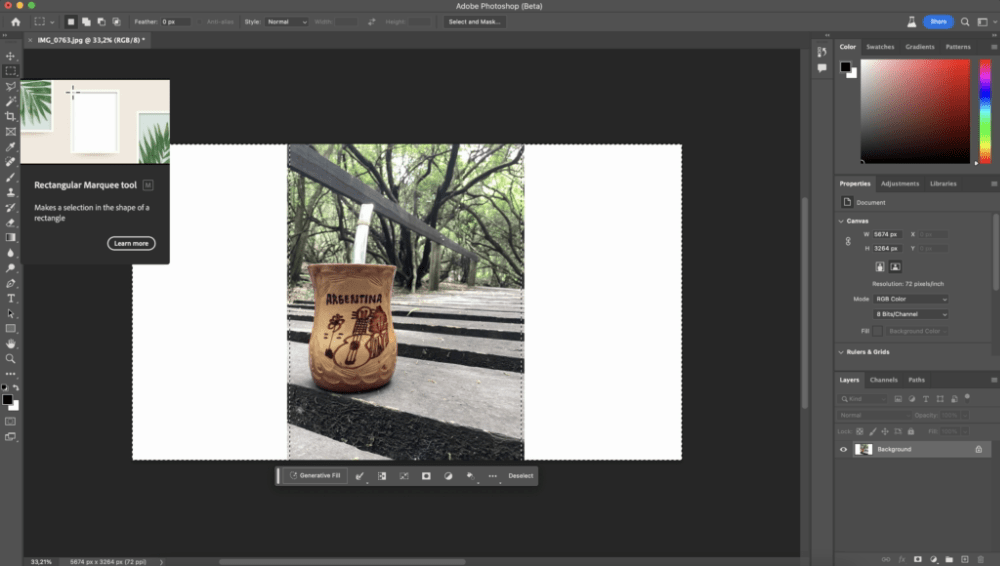
What we will do is select all the space that we want to fill with AI, making a small selection even from the original image, so that it takes said image as a reference. Then, once we do this, we will press the “Generative Fill” button.
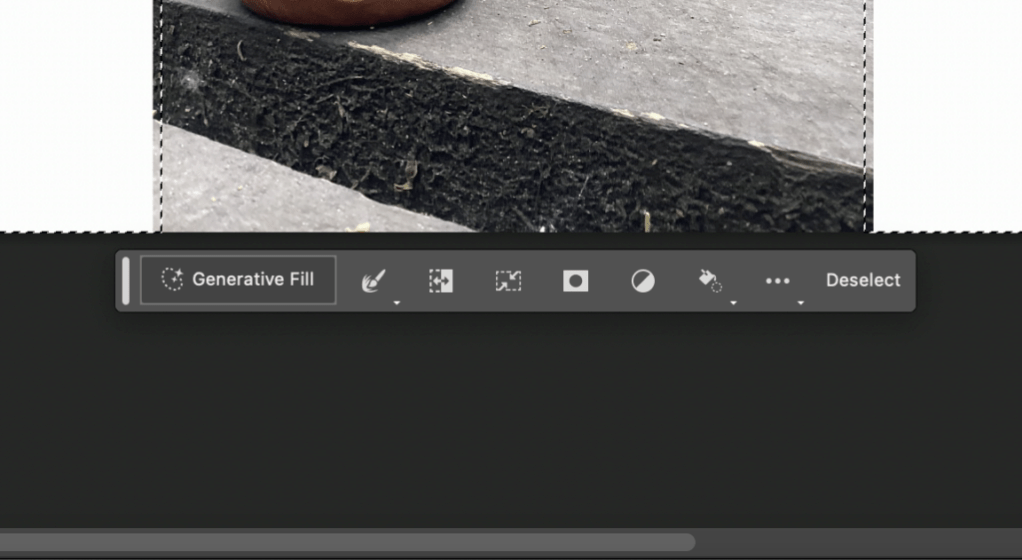
Finally, here we will press “Generate”. We do not need to describe anything to the AI, as this function does not require it.

Finally we will get the results. By default the tool will show us one result, but it will give us the option to choose between other options by pressing the arrows that we will find in the bar below the image.
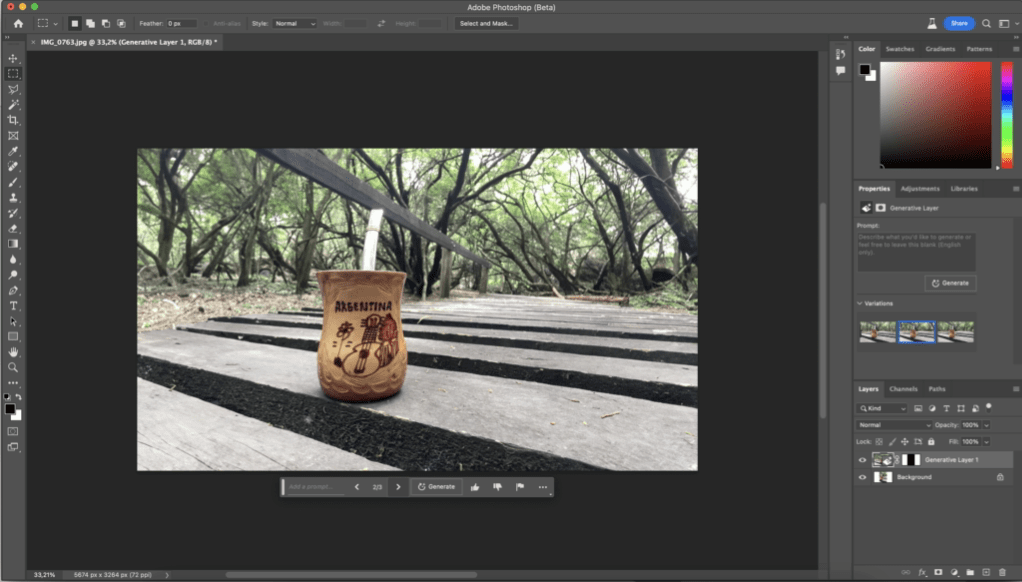
Once finished, the extended canvas is instantly filled with new, original AI-generated content. This is an incredible thing to see, as with just a few steps we can achieve amazing results.
With my image, Generative Fill extended the side of the building to perfectly match the perspective and depth of field of the original photo. It also extended the shadows, as well as the shining lights, to maintain the same light source and direction.
In this section
No posts found


